Connect Jamf with Siit
What benefits does the integration offer?
-
Full Equipment Sync (🔄): Siit synchronizes all equipment, associating them with employees for comprehensive visibility into the devices assigned to each employee.
-
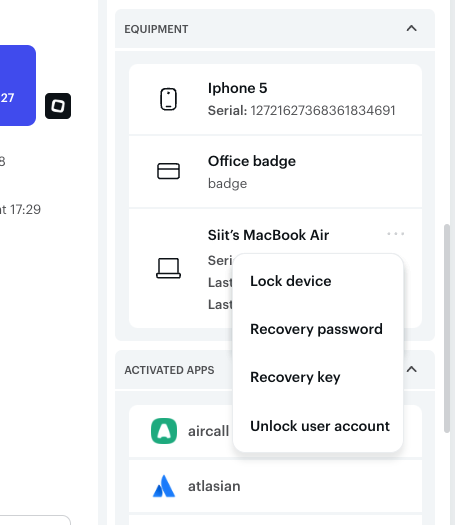
Quick Actions Capability (🚀): Siit enables IT professionals to trigger Jamf actions, such as locking or unlocking devices, or resetting passwords directly from the Siit interface.
How to set up Jamf integration?
The process of connecting Siit with Jamf MDM is straightforward. Follow these steps:
-
Navigate to the "Apps and Integration" page in the Siit admin console.
-
Search for and click on "Connect Jamf Integration."

-
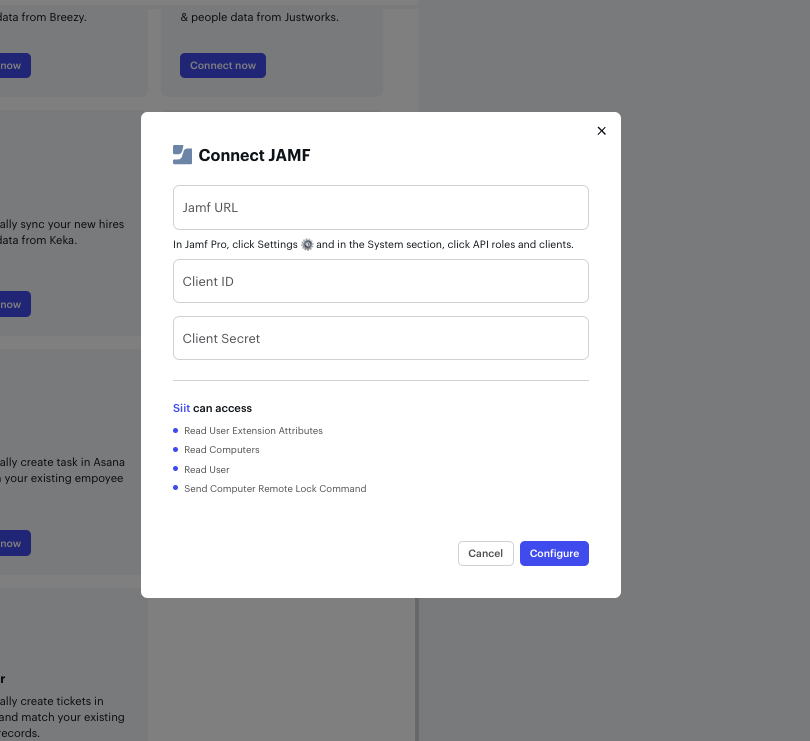
You have to fill up the following information
-
Jamf URL
-
Client ID
-
Client Secret
-
To provide those information
-
You will need to go to your Jamf dashboard. In the Jamf dashboard, go to Settings and search for "API Roles & Clients."
-
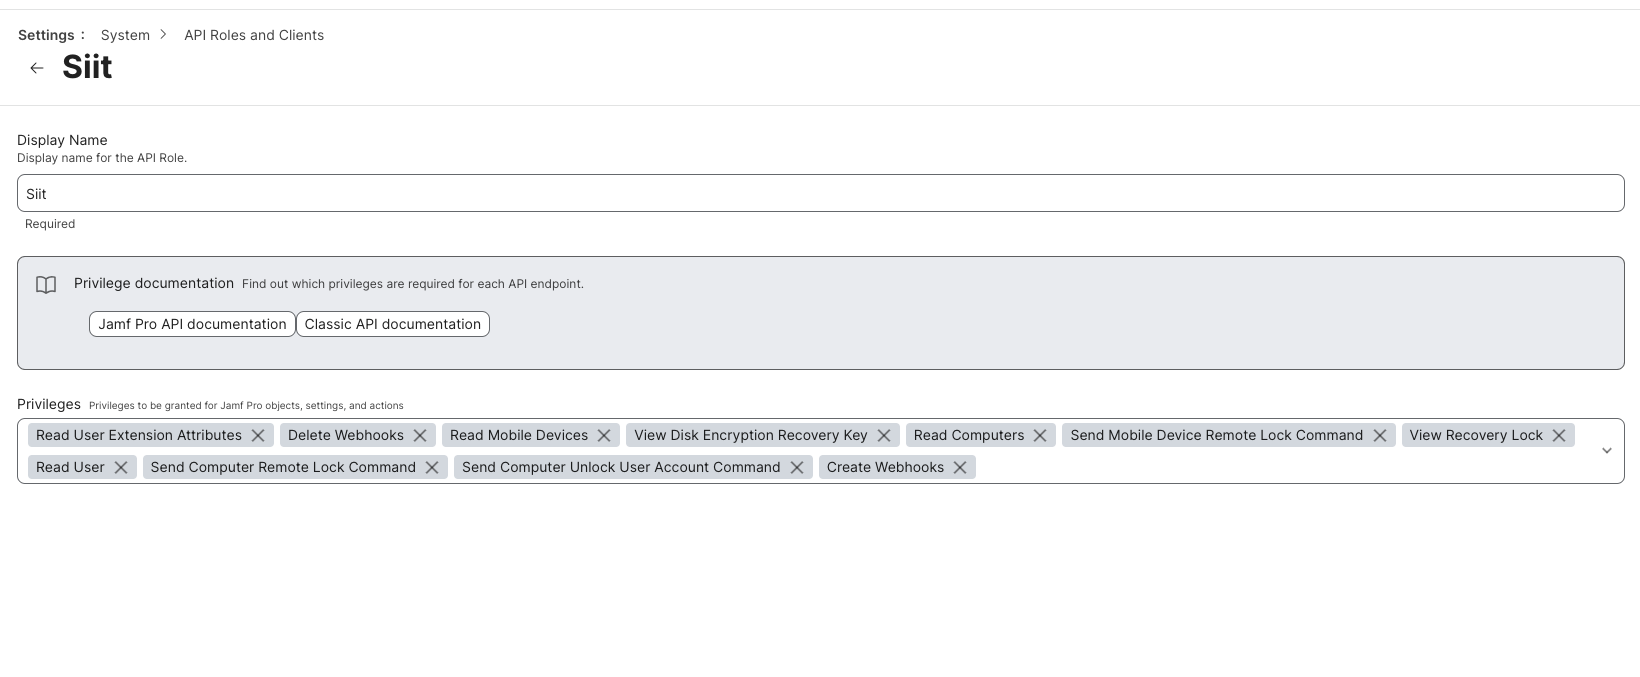
Click on "New API Roles" and grant the following permissions:
-
Read User Extension Attributes -
Read Computers -
Read User -
Send Computer Remote Lock Command -
Read Mobile Devices -
Send Mobile Device Remote Lock Command -
Send Computer Unlock User Account Command -
View Disk Encryption Recovery Key -
View Recovery Lock -
Create Webhooks -
Delete Webhooks
-

-
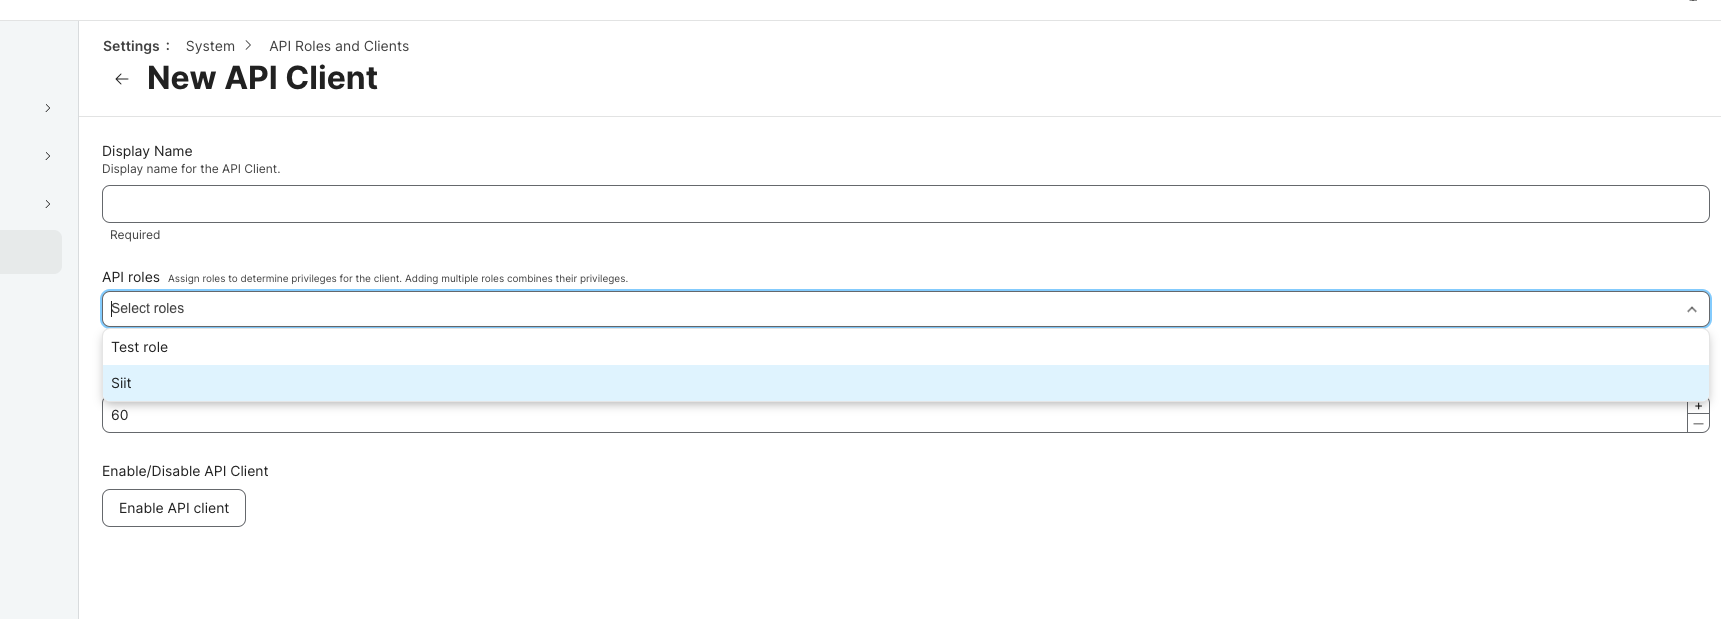
After creating API roles, go to API Client, click on "New," select the API roles created, and enable the API client.

-
Copy and paste all the information into Siit and click on "Configure".
After completing these steps, the integration will work seamlessly.
All equipment will be synchronized, providing full visibility on equipment per employee. Additionally, in request conversations, you will be able to execute quick actions like locking devices, recovering passwords, retrieving recovery keys, and unlocking user accounts.
If you encounter any technical issues, our dedicated support team is here to assist you. Feel free to reach out to us via email at [email protected] or contact your assigned Customer Success Manager for personalized assistance.
We're committed to ensuring a smooth experience with the Siit & Jamf MDM integration and are ready to support you every step of the way.

