
Before you start
- You need a Siit account with access to your workspace
- The Siit MCP server endpoint is https://mcp.siit.io/mcp
- The Public API feature must be enabled for your role. You can turn this on under Settings → Role & permissions → Public API.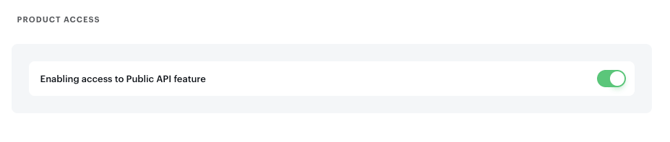
Claude (Desktop and Web)
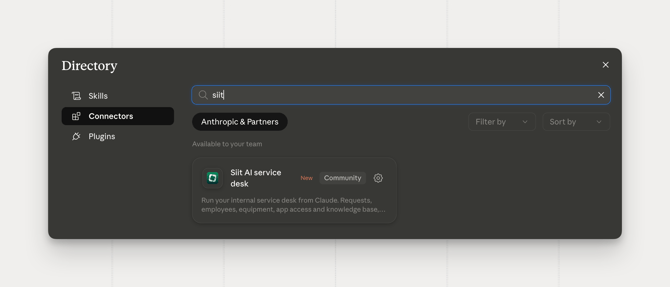
Siit is listed in Claude's connector directory, so most people won't need to enter anything by hand.
1. Open Customize, then Connectors.
2. Browse or search for Siit in the directory.
3. Click Connect and authorize with your Siit account.
Claude Code
Run the following in your terminal:
claude mcp add --transport http siit https://mcp.siit.io/mcp
Then open a Claude Code session and run /mcp to complete the authentication flow.
Codex — Via CLI
Run:codex mcp add siit --url https://mcp.siit.io/mcp
You'll be prompted to log in with your Siit account automatically.
Note: If this is your first time using an MCP in Codex, you need to enable the rmcp feature first. Add the following to ~/.codex/config.toml:[features]experimental_use_rmcp_client = true
Codex — Via config file
1. Open ~/.codex/config.toml. in your preferred editor
2. Add the following:
toml
[features]experimental_use_rmcp_client = true[mcp_servers.siit]url = "https://mcp.siit.io/mcp"
3. Run codex mcp login siit to complete authentication.
Mistral
1. In Mistral, open the MCP connectors settings and select Custom MCP Connector.
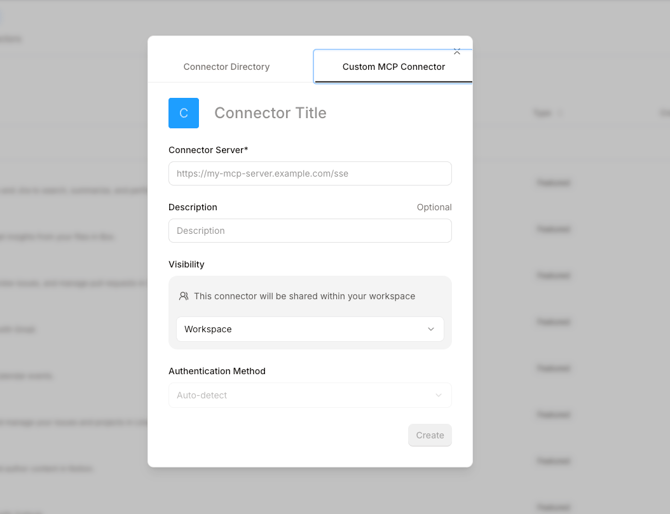
2. Enter Siit as the Connector Title.
3. Set the Connector Server to https://mcp.siit.io/mcp
4. Leave Description blank (optional).
5. Set Visibility to Workspace so the connector is shared with your team.
6. Leave Authentication Method on Auto-detect.
7. Click Create and authorize when prompted.
 Once connected, Siit appears under Connected in your Mistral connectors list.
ChatGPT
Siit connects to ChatGPT as a custom connector.
1. In ChatGPT, open Settings → Connectors and select Create.
2. Enter Siit as the connector name.
3. Set the MCP Server URL to `https://mcp.siit.io/mcp`.
4. Set Authentication to OAuth.
5. Open Advanced OAuth Settings and make sure Dynamic Client Registration is enabled. ChatGPT does not turn this on by default, and leaving it off is the most common cause of connection errors with this client.
6. Click Create, then authorize with your Siit account.
>Note: If you see "There was a problem connecting Siit.io MCP. Try again later." after removing and re-adding the connector, check that Dynamic Client Registration is still enabled under Advanced OAuth Settings.
Cursor
Visual Studio Code
-
Press
Ctrl/Cmd + Pand search for MCP:Add Server. -
Select Command (stdio).
-
Enter the following command and press Enter:
npx mcp-remote https://mcp.siit.io/mcp -
Name the server Siit and press Enter.
-
Go to MCP: List Servers, select Siit, then select Start Server
Windsurf
-
Press
Ctrl/Cmd +, to open Windsurf settings. -
Scroll to Cascade → MCP servers.
-
Select Add Server → Add custom server.
-
Paste the following configuration:
{"mcpServers": {"siit": {"command": "npx","args": ["-y", "mcp-remote", "https://mcp.siit.io/mcp"]}}}
Zed
-
Press
Cmd +, to open Zed settings. -
Add the following:
{ "context_servers": { "siit": { "source": "custom", "command": "npx", "args": ["-y", "mcp-remote", "https://mcp.siit.io/mcp"], "env": {} } }}
Other MCP-compatible tool
For any other client that supports MCP:
- Command: npx
- Arguments: y mcp-remote https://mcp.siit.io/mcp
- Environment: None
Troubleshooting
I see an "internal server error" when connecting
Clear saved auth data and try again:rm -rf ~/.mcp-auth
You may also need to update Node.js to a more recent version.
Does the MCP support Streamable HTTP?
Yes — at https://mcp.siit.io/mcp
Which version of Node.js do I need?
We recommend the latest LTS version. If you run into issues, updating Node is the first thing to try.
Can I pull satisfaction survey ratings through the MCP or the API?
Yes. Requests returned by get_request, list_requests, and the Public API's /v1/requests/{uid} endpoint now include a satisfaction_survey_rating field, the rating the employee left after the request closed, or empty if they never responded. You don't need a separate call or an `expand[]` parameter; it comes back with the rest of the request data automatically. This is the easiest way to pull CSAT into an external dashboard instead of using manual exports.
Can I manage Group Requests through the MCP or the API?
Yes. New MCP tools create, read, and manage a request group, and the Public API's request endpoints understand groups too. Available on all plans.
Can I approve or reject app access requests through the MCP or the API?
Yes. The Public API returns an app access request's app, status, and full timeline, and two new MCP tools let an agent approve or reject a pending request directly, so a backlog of access decisions can be worked through end to end without opening the admin console. Available on the Pro plan.