What is this guide?
This guide is designed to help you configure your Siit MVP independently, step by step.
By the end of this setup, you will:
-
Centralize your internal data in Siit
-
Enable employees to submit requests
-
Allow teams to process them efficiently
-
Start measuring activity from Day 1
No advanced configuration required — just the essentials to go live quickly and start generating value.
STEP 1 — Connect Your Integrations
🎯 Objective
Bring your company data into Siit so requests are enriched with the right context (people, apps, equipment, knowledge).
Before employees can submit requests, Siit needs to understand:
-
Who your employees are
-
What tools they use
-
How your organization is structured
That’s why we start with integrations.
1. Connect your core tools
Go to Settings ⚙️ → Integration Library and connect your main tools.
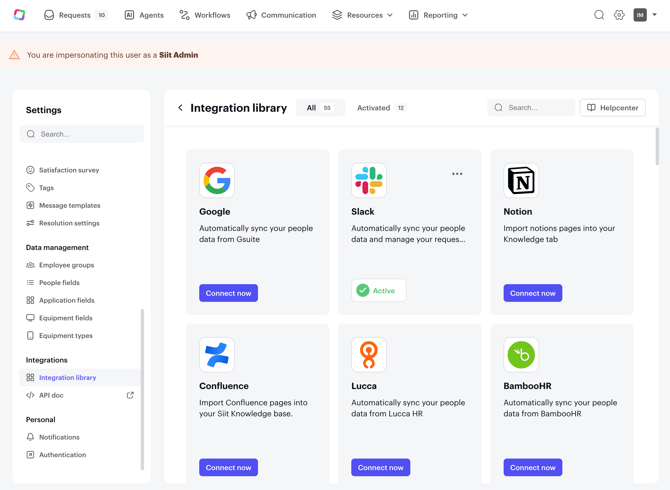
We recommend prioritizing:
💬 Communication tools
Slack / Microsoft Teams
This is where employees will interact with Siit.
👥 HRIS
Examples: Hibob, BambooHR, Lucca, ADP, Rippling
This ensures employee data (department, manager, start date, etc.) is synced.
🔐 Identity Provider (IDP)
Examples: Okta, JumpCloud, Entra ID, Google
Required if you plan to automate access provisioning.
💻 MDM
Examples: Kandji, Intune, Jamf
Useful for equipment visibility and lifecycle processes.
📚 Knowledge Base
Notion, Confluence
Enables AI replies and knowledge suggestions.
🎫 Ticketing / Project Management
Jira, Asana, Trello, Freshdesk
Optional — only if you want to sync requests externally.
💡 If a tool isn’t natively supported, you can connect it via API or webhooks.
2. Choose your source of truth for employee data
🎯 Objective
Ensure employee data is reliable so routing, automation, and permissions work correctly.
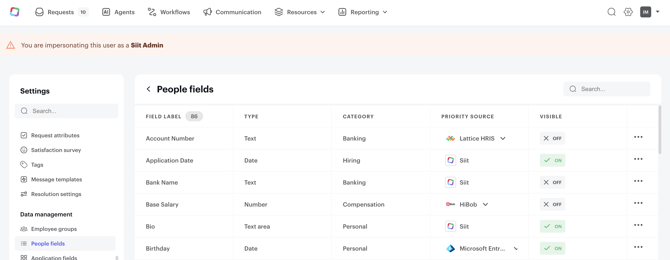
Go to Settings ⚙️ → People fields and define the priority source for employee attributes.
This is essential for:
-
Routing requests by department
-
Restricting services by audience
-
Triggering onboarding/offboarding workflows
Top commonly used fields:
-
Department
-
Manager
-
Start date
-
End date
-
Location
-
Job title
Once completed, check the Resources section (People, Apps, Equipment, Articles) to confirm data is syncing properly.
STEP 2 — Structure Your Internal Support Model
🎯 Objective
Define how requests are organized, owned, and processed internally.
Now that your data is centralized, the next step is to design how your teams will operate inside Siit.
This includes:
-
Creating inboxes (who handles what)
-
Defining services (what employees can request)
1. Create your team inboxes
Go to Settings ⚙️ → Team inboxes
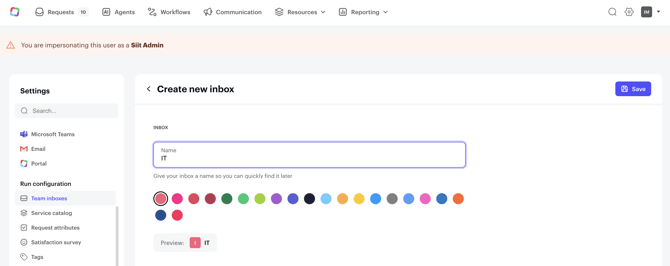
Create inboxes for the teams handling requests:
-
IT
-
HR
-
Finance
-
Operations
-
Workplace
💡 Keep it simple to start. Many companies launch with just one inbox and expand later.
This defines ownership and visibility for incoming requests.
2. Build your Service Catalog
🎯 Objective
Design the employee-facing request experience.
The Service Catalog defines:
-
What employees can request
-
How requests are routed
-
What information is collected
-
What SLAs apply
Key concepts
-
Category → Logical grouping (IT, HR, Finance…)
-
Service → The actual request type (App Access, Equipment, Payroll, Onboarding…)
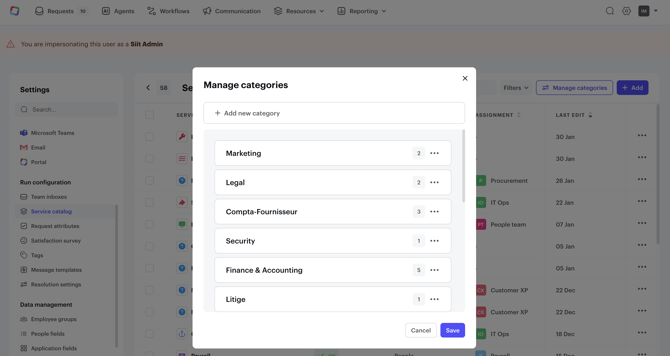
Create categories
Go to Settings ⚙️ → Service catalog → Manage categories
Create your main categories (IT, HR, Finance, etc.).
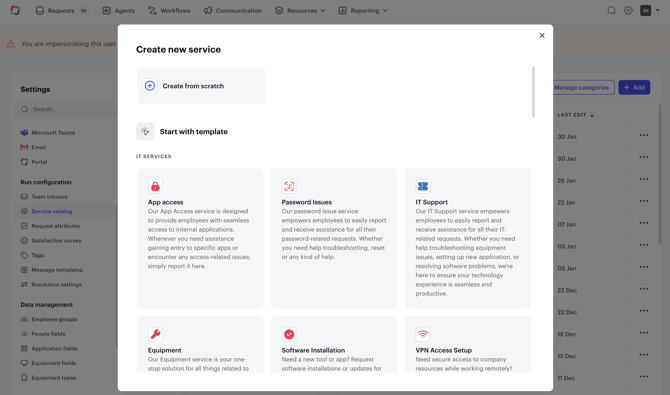
Create your first services
Go to Settings ⚙️ → Service catalog → Add
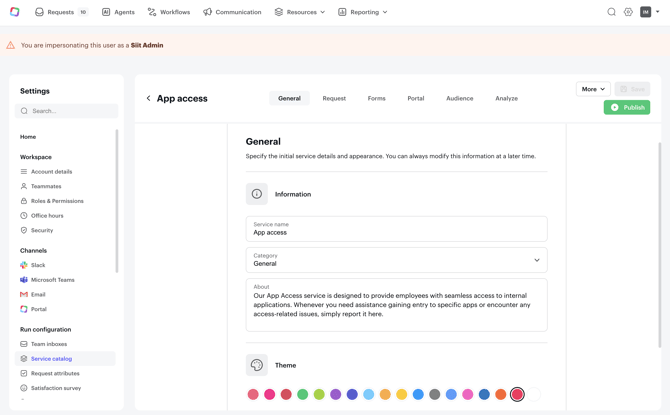
For each service:
-
Give it a clear name
-
Add a short employee-friendly description in the "About" (both used in the employee portal and by the AI for Triage)
-
Choose a category
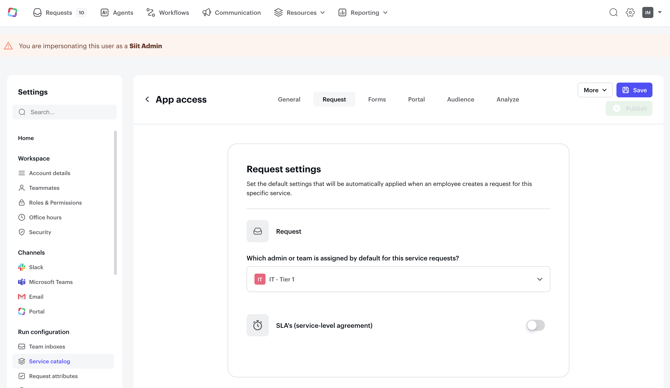
4. Assign it to the right inbox
5. Set SLAs if needed
6. Build the service form (collect only essential information)
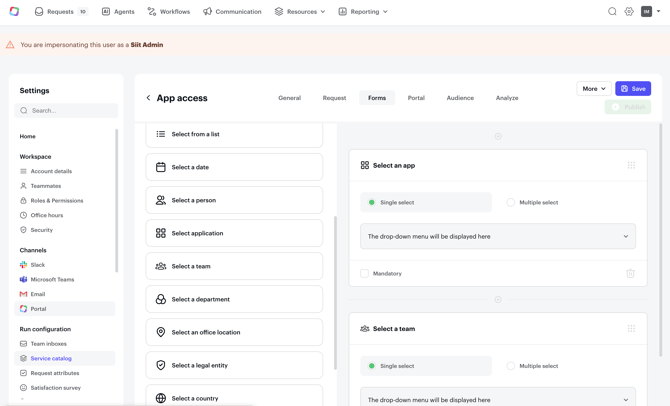
7. Save
Your service is now live.
💡 Best Practice
Start with your top 5–10 most frequent requests:
IT
-
App access
-
Equipment request
-
Password issues
-
Onboarding
-
Offboarding
HR
- Internal mobility
-
Sick Leave
-
Time off
- Payroll
Finance
-
Contract question
- etc
You can expand later based on Analytics.
STEP 3 — Configure your Communication Channels
🎯 Objective
Decide where and how employees interact with Siit.
Now that:
-
Your data is synced
-
Your services are created
-
Your inboxes are structured
You’re ready to enable employee interaction.
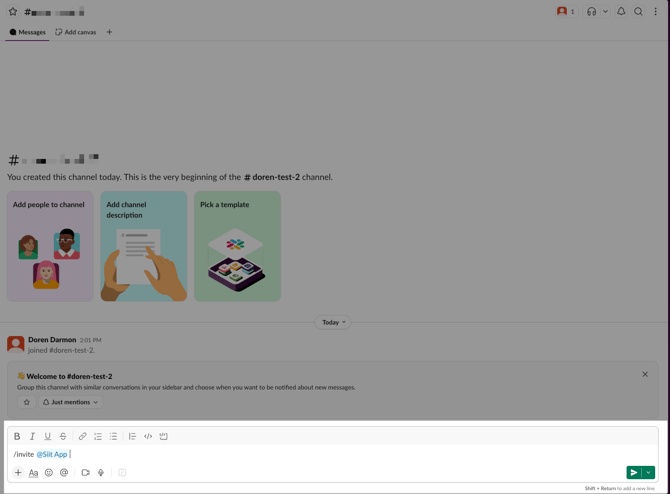
1. Slack
(Prerequisite: Slack integration connected)
Add Siit to your Slack workspace and relevant channels.
Then go to Settings ⚙️ → Channels → Slack
For each channel, define:
WHEN
Should Siit respond to every message or only when mentioned?
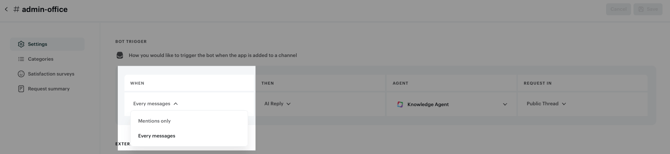
THEN
Choose the behavior:
-
AI Reply → Answers automatically (Pro plan)
-
Submit button → Suggests opening a request
-
Auto submit → Creates a request for every message
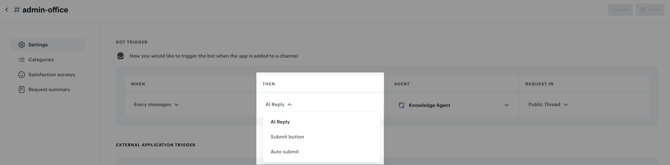
AGENT
Select which AI Agent handles the channel.

REQUEST VISIBILITY
Choose whether activity appears:
-
In public threads
-
In the private Siit app
⚠️ Remember that if sent on a public Slack channel, the first message of the requester (before the request is created) will always be visible in the channel.
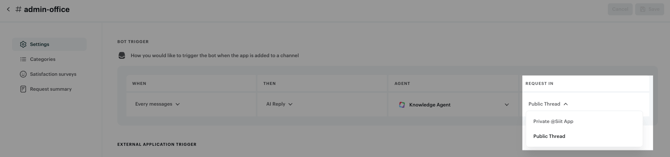
2. Microsoft Teams
Pre-requisite : the Teams integration must be done before this step.
Once Microsoft Teams is connected to Siit, you can configure how Siit behaves both in the Siit app and in your Teams channels.
If you plan to use Siit in specific channels, start by adding the Siit bot to those channels.
⚠️ the IT Agent is not yet available on the Siit app in Teams, but only on channels.
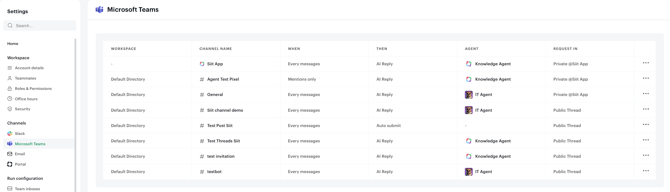
Go to: Settings ⚙️ → Channels → Microsoft Teams
Configuration logic is the same as Slack:
-
Interaction trigger
-
Behavior
-
Assigned agent
-
Request visibility
3. Siit Portal
You can also enable the Employee Portal for a structured, self-serve experience.
Here is how to set up the Employee Portal
This is ideal if:
-
You prefer a centralized request hub
-
You want stronger service catalog visibility
You’ve now completed the core configuration needed to launch your Siit MVP.
Your data is synced, your support model is structured, and your employee entry points are ready.